
Exploring Microscopes
The compound microscope is believed to have been invented in about 1595 by Zacharias Janssen and his father Hans Janssen. Their primitive device had two lenses that only allowed them to see objects about nine times larger than normal. The invention, however, quickly underwent many changes as other scientists altered the initial design. By 1665 some microscopes were able to magnify up to 250 times, a significant improvement over the capabilities of the early Janssen instrument.
One of the scientists that utilized the greatly improved compound microscope in his research was Robert Hooke, who published a remarkable book of many of his microscopic observations in 1665. The work, titled Micrographia, contained detailed drawings and descriptions of a variety of small objects, such as flies and fleas. Other scientists, however, such as Anton van Leeuwenhoek, preferred to use simple microscopes constructed with very good lenses. Van Leeuwenhoek's great care in grinding these lenses produced excellent results, the magnifying power of his simple microscopes ranging from about 70 times to more than 250 times actual size. With the instruments he produced detailed studies of many tiny "animalcules" and was the first person to ever see bacteria.
Simple microscopes contain a single lens but, at its simplest, a compound microscope needs two lenses, a small but powerful objective lens, and a larger eyepiece lens. Light from the specimen is focused by the objective lens so that it forms a magnified image. The eyepiece lens then enlarges this just like a magnifying glass, so that the observer's eye traces the light back to see a much bigger image. A compound microscope produces an image that is inverted, or back-to-front.
Required Materials
- Slides
- Glass marking wax pencils
- Droppers
- Small container of water
- Hand lenses
- Field microscopes
- Source of light, flashlights or good room light
- Newsprint and comics from the newspaper
- Science notebooks
What will the students do?
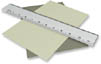
Students will be carrying out comparative observations of objects using a simple water drop magnifier, a hands lens, and a field microscope, which is an example of a basic compound microscope. Thus, the first thing they will need to do is to construct a water drop magnifier. Students will take the plastic slide and draw a circle in the center of the slide with the grease pencil. The circle should be a little smaller than the diameter of a dime. Students should then find a lower case "e" in the newspaper to observe with their water drop magnifier. They will then add one drop of water to the circle, observe the "e", add a second drop of water, observe again, and a third drop of water to the circle and observe and record differences in their science notebooks. Students will then take part of the comics and observe the dots that form the images on the page, again using a 1-drop magnifier, a 2-drop magnifier, and a 3-drop magnifier.
The water drop magnifier created by the students in this part of the activity is actually a plano-convex lens. The more water that is added to the circle, the thicker the "lens" is going to be; consequently, the focal point and the magnification will change. As students first begin to move the "lens" further away from the newsprint, the image grows larger. If they continue to move the lens away from the page it will become fuzzy and when it comes back into focus the image will appear upside down. This is because of the way the lens bends the light traveling from the page to your eye. When the lens is close to the page, you see what is known as a virtual image, which is an upright image that is larger than the image on the page. As you move the hand lens closer to your eye and away from the page, you see what is called a real image, which is upside down.
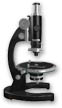
After this part of the activity, students will look at the letter "e" and the colored paper of the comics through a hand lens and then a field microscope, recording their observations in their science notebooks. Focal length and the clarity of the image or colors they are able to see are some the issue that they may want to comment upon. It is suggested that students be made aware of the functions of the parts of the field microscope, as well as how to focus and to properly place the specimens on the stage of the microscope before they begin using the instrument.
To operate the field microscope, place it on a level surface and insert the specimen slide under the stage clips. Rotate the mirror, using gentle pressure on one or both of the mirror hubs until the maximum amount of light is reflected from the mirror into the eyepiece. This is called the field of view. Focus slowly by turning the focus wheel with your thumb. To get a good image, light must pass through a transparent or translucent specimen, or bounce off the top of an opaque specimen. The higher the power of magnification, the greater the intensity of light needed. A lamp or brightly lit window should be sufficient. However, light from fluorescent bulbs generally yields better images than incandescent bulbs. Also, if your students are working as partners, one of them could shine the flashlight down on the specimen so that enough light is produced to see an image.
| Interactive Java Tutorial | |||||||||||
|
|||||||||||
Activity Extensions

Reading - Read aloud, or have available, A Drop of Water by Walter Wick (ISBN 0590221973). The book uses illustrations and some text to describe the properties of a drop of water. The information would be a good activity warm-up, relating directly to the construction of a water drop magnifier.
Expository Writing - Use the following as an expository writing prompt: Microscopes and telescopes both use lenses. Before you begin writing, think about the similarities and differences in how microscopes and telescopes work. Now write how you could make a telescope from simple materials that would allow you to see things at a distance.
Observation - The book Looking for Atlantis by Colin Thompson (ISBN 067985648X) is rich with images that challenge the reader to identify the thousands of objects "hidden" in the pictures. Beneath each illustration is another illustration of an imaginary world. Have students use their powers of observation to identify as many items as they can and then work with classmates to develop a complete list.
Narrative Writing - Use the following as a narrative writing prompt: Microscopes are often used to study microscopic life in ponds. Pretend that you are investigating a neighboring pond that suddenly changed colors from a light brown to a bright green. Now write a short story about how you would investigate this problem using a microscope.
Historical Vignette: Zacharias Janssen

The origin of the optical microscope is a matter of debate. However, most scholars agree that the invention of the compound microscope can be credited to Zacharias Janssen, who may have been helped by his father Hans, in the late sixteenth century. At that time eyeglasses were beginning to enjoy widespread use, which focused a great deal of attention on optics and lenses. Part of the confusion about who actually invented the first compound microscope is due to the fact that no early Janssen microscope has survived the test of time, though a microscope that can be found in a Middleburg, Holland museum is sometimes alleged to be a work of Janssen.
Luckily, there was one true Janssen microscope that endured long enough to be studied. As was customary at the time, the Janssens made several examples of their microscope to give to royalty. One of those was sent to Prince Maurice of Orange and one was given to Archduke Albert of Austria. Though neither of these microscopes survived to modern times, one of them was examined in the early 1600's by a childhood friend of Zacharias Janssen, who made record of his observations. In his description, he portrayed the royal instrument as being made of three sliding tubes, measuring 18 inches long when fully extended, and two inches in diameter. He also described the instrument as being very ornate, with 3 brass dolphins at the end forming the feet of a tripod. The microscope, was not apparently very powerful, however, only containing two lenses and magnifying objects nine times.
Activity - Robert Hooke was one of the early scientists who utilized a compound microscope for research. He was also the first scientist to use the term "cell" to describe the individual units of living things. Encourage students to research how Hooke decided on this name and to draw what he first saw.
Writing - The only way that we know that Zacharias Janssen invented a compound microscope was because someone else documented his invention. Discuss with students the importance of keeping accurate and detailed records in both words and drawings. Use the field microscope from your package and have students draw the instrument and write a description of how it works as if no model of the microscope existed.
Artist Vignette: Georges Seurat

During his short life the French painter Georges-Pierre Seurat (1859-1891) was an innovator in the field of art and a leader in a late nineteenth century movement called neo-impressionism. An artistic scientist of sorts, Seurat spent much of his life investigating how different colors and lines would change the look or texture of a canvas. His experiments with color and his desire to represent nature led him to develop a new technique of painting called pointillism, which involves creating an illusion of depth and light and dark values by grouping dots of ink. Although this technique made it take much longer to produce a painting, during his lifetime Seurat produced over 500 pieces of artwork.
Seurat was extremely interested in the way that colors work together to create a particular tone. By using pointillism, he was able to achieve an illusion of varying hues of color by simply changing the space between the dots. He found that dots of ink placed close together create a dark value, while the further apart the dots are placed, the lighter the value appears. Also, he discovered that a gradient from light to dark can be created by gradually varying the space between the dots and that the individual colors tend to interact with those around them, fusing in the eye of the viewer to create a seamless image. This concept is similar to the way thousands of dots or pixels blend together to compose an apparently smooth image on a computer screen.
Activity - Students can produce a drawing using pointillism by following these directions. First they should create a light pencil sketch of their object, which will only act as a reference and will be erased once the drawing is complete. They should create the darkest values first by placing dots very close together. Next, they should create the illusion of a lighter value by extending the distance between the dots, gradually extending the distance between the dots as they attempt to capture the natural shading of the object. Afterwards, have them step back and take a look at the drawing. They should then make any changes needed.