
Using Microscopes to Investigate Birefringence in Crystals
Though all crystalline substances are composed of atoms and molecules that are arranged in an orderly, repetitive pattern, the patterns they exhibit vary. The simplest crystal structure is cubic, which means that the atoms are uniformly spaced along three mutually perpendicular axes. The crystal structure is said to be isotropic if the spacing of the atoms is the same along each axis. If the spacing or arrangement of atoms along one axis is different from that of another axis, then the crystal is said to be anisotropic. If the atoms or molecules of a solid are not arranged in a regular periodic structure, then the solid is said to be amorphous. Glass and plastic are examples of amorphous solids, table salt is an example of an isotropic crystal, and snowflakes or calcite are examples of anisotropic crystals. The patterns of crystals are predictable and can be manipulated by scientists using, for example, high magnetic fields.
An optically isotropic medium is the same in all directions and has only one index of refraction. Crystals, however, that are anisotropic are also optically anisotropic. An anisotropic crystal whose lattice is the same along two directions but different along the third, is double refractive or birefringent. A birefringent material has two indices of refraction, one index for the two directions that are the same and another axis for the direction along which the molecules are spaced differently. Calcite, or calcium carbonate, is the most common birefringent mineral found in nature. It is colorless, transparent, and usually has the shape of a rhombohedron.

Allow at least 1 day to discuss and make crystals with the students and a second day to observe them. The total amount of time, however, that it will take to complete the activity depends upon how many different crystals your students will be making and observing.
Required Materials
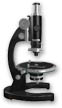
- Compound light microscopes
- Glass slides
- Epsom salt, copper sulfate, Vitamin C powder
- Warm water
- Polarizers
- Science notebooks
- Transparent cellophane tape and invisible cellophane tape
- Calcite crystals
What will the students do?
Students will be forming several different types of crystals and observing them with their eyes, with a hand lens, and using their field microscopes. They will record their observations in their science notebooks, illustrating each type of crystal and drawing comparisons between them.
Then, as an introduction to birefringence, students will put a piece of transparent cellophane tape on one glass slide and a piece of magic tape on another. They should then place one of the polarizers below the slide and another one on top of the slide. Students will rotate the polarizers slowly and observe what happens and then repeat the procedure with the other slide. They should find that one of the two slides exhibits birefringence or double refraction.
| Interactive Java Tutorial | |||||||||||
|
|||||||||||
Next, students will view a black dot on white paper through a glass slide. They should see only one dot. Then they should view the black dot again through a calcite crystal. Two dots should appear due to calcite's birefringence. Students will now rotate the calcite crystal while viewing the two dots. One dot will remain stationary while the other dot rotates about the stationary one. If they then view the dots through a polarizer, students will see that they are polarized and their axes of polarization are perpendicular.
Finally, students will investigate the various crystals using the polarizers and the microscopes. They should place one of the polarizers beneath the slide and place these two objects on the stage of the microscope. Students should place the other polarizer on top of the eyepiece of the microscope. While looking at the different crystals, students will rotate the lens on top of the eyepiece, noticing and recording which crystals exhibit birefringence in their science notebooks.
| Interactive Java Tutorial | |||||||||||
|
|||||||||||
Activity Extensions

Narrative Writing - Use the crystal-making experience to encourage students' creative writing, utilizing the following as a prompt: Each of us has seen the beauty of crystals after they are polished, cut, and made into jewelry. Think about a time that you saw a lovely piece of jewelry that was special to someone. Now tell the story of that special piece of jewelry and why it was special.
Poetry Writing - Read aloud poems from Once Upon Ice and Other Frozen Poems by Jane Yolen (ISBN 1563974088) and have students compare the crystals they made with ice crystals. Then have students write poems about the crystal shapes they observed.
Research - Have students research birthstones and other gemstones. Encourage them to investigate myths and legends that have been written and/or passed down from generation to generation regarding gemstones. Also, ask them to identify their birthstones and share the information with the class.
Reading - Wilson Bentley (b. 1865) was a photographer who concentrated on capturing the unique beauty of snow crystals. Snowflake Bentley by Jacqueline Briggs Martin (ISBN 0395861624) is an age-appropriate introduction to the biography genre. The book tells the story of Bentley's work as developer of the process of microphotography and its beginning in his Vermont childhood. The text is not only germane to the study of crystals, but also points out to young children that things they are curious about at a young age can become the focus for lifelong study.
Art - Students can create a coloring book of patterns they observed when examining the crystals they made. Intermediate students could create a color-by-number page for younger students to color. You may wish to have them research photomicrographs of crystals whose special properties have been used to create color images. For younger students, have them draw a coloring page based on the patterns they observed and color them. You can xerox the pages and have students exchange with one another.
Historical Vignette: Antonie van Leeuwenhoek

Antonie van Leeuwenhoek (1632 -1723) was a Dutch zoologist best remembered for his depiction of red blood corpuscles. Van Leeuwenhoek was able to draw these tiny structures only after he experimented with different simple microscope designs. The simple microscope van Leeuwenhoek used was metal with a single lens. It had such a short focal length that the instrument had to be held very close to his eye so that the object he was looking at would be in focus.
Leeuwenhoek is often given credit for inventing the microscope. However, compound microscopes (microscopes using more than one lens) had been built and used as early as 1595, well before Leeuwenhoek was born. What he did do was make improvements to the lenses that were used in microscopes, using his talents as a lens grinder to develop lenses that magnified over 200 times. He also recognized that one needed to take great pains to properly adjust the lighting that was used with microscopes to maintain clarity. His detailed drawings and descriptions distinguished Leeuwenhoek from his contemporaries. Interestingly, Leeuwenhoek was not very good at illustrating his own descriptions, so he hired an artist to complete the artwork.
Until his death in 1723, Leeuwenhoek received artists, scientists, and other interested people, such as Tsar Peter the Great from Russia, who were fascinated by the odd things he was able to see. This included the "animalcules, a-swimming" in his mouth (plaque) and all types of plant and animal tissues.
Activity - Have students work in pairs. One student will observe an object using the field microscope and describe it in words to his or her partner. The partner will attempt to draw the object based on that description. Encourage students to communicate with one another as the drawings progress. Then, check the accuracy of the drawing against the image seen through the microscope.
Writing - Leeuwenhoek once stated the following:
. . . my work, which I've done for a long time, was not pursued in order to gain the praise I now enjoy, but chiefly from a craving after knowledge, which I notice resides in me more than most other men. And therewithal, whenever I found out anything remarkable, I have thought it my duty to put down my discovery on paper, so that all ingenious people might be informed thereof. (Letter written in June 12, 1716)
Have students discuss why it is important to record their observations, discoveries, questions, and possible answers. Many scientists are famous for their diaries and journals (for example, Leonardo da Vinci and Galileo Galilei). Students should pretend they are writing to a friend who knows nothing about microscopes how the instrument works and what they saw using the microscope.
Artist Vignette: Pablo Picasso

Pablo Picasso (1881-1973) was born in Malaga, Spain, the son of an art teacher. Picasso became a prolific artist whose work expressed many different artistic movements. One of the many and varied techniques that Picasso experimented with was cubism. This technique incorporates flattened images that appear fragmented and involves blending shapes to express the artist's emotion. Although Picasso was schooled in the great masters of the past, he is known as a modern painter.
Most Americans knew little about the cubism movement until 1913 when there was a famous Armory Show in New York. This was the first time that new radical European art was featured in a major art show. Even though most of the show was devoted to realist mainstream American art and featured American contemporary artists, it is best remembered for introducing modern art to Americans.
Activity - Encourage students to use the crystal shapes they observed to create art. Whether they use the shapes to create recognizable figures or as the basis for abstract art, students should be able to explain their work to others. It may represent an emotion, a scene, a person, people, animals, or an event. The artwork could take many forms, such as a painting, a sculpture, or a collage.
|
||||||||