
Interactive Tutorials
Spatial Averaging
There exist numerous potential sources for noise that can seriously affect the quality of digital images captured in the microscope. Noise can often be eliminated or reduced utilizing a technique known as spatial averaging, but application of these algorithms can eliminate some image detail as well. This interactive tutorial explores the benefits and consequences of spatial averaging as a method for removing noise from digital images.
The tutorial initializes with a randomly selected specimen digital image (captured in the microscope) appearing in the left-hand window entitled Specimen Image. This image initially appears corrupted (by default) with five percent impulse noise arbitrarily added to the image. Each specimen name includes, in parentheses, an abbreviation designating the contrast mechanism employed in obtaining the image. The following nomenclature is used: (FL), fluorescence; (BF), brightfield; (DF), darkfield; PC phase contrast; DIC, differential interference contrast; HMC, Hoffman modulation contrast; and (POL), polarized light. Visitors will note that specimens captured using the various techniques available in optical microscopy behave differently during image processing in the tutorial.
Adjacent to the Specimen Image window is the Spatially Averaged Image window that displays the image that results from applying a spatial averaging convolution operation to the original noisy image. In order to operate the tutorial, select a specimen image from the Choose A Specimen pull-down menu and select a convolution kernel from the Choose A Convolution Kernel pull-down menu. The Noise Level slider determines how much noise is added to the specimen image. The specimen image can be filtered a variable number of times by translating the Averaging Iterations slider from left to right. When the Gaussian Filter option is selected from the Choose A Convolution Kernel pull-down menu, the Averaging Iterations slider will be replaced by a Standard Deviation slider that enables the user to adjust the standard deviation (in pixels) of the Gaussian kernel used to filter the image. The Convolution Kernel display area, which is located below the Spatially Averaged Image window, displays the selected convolution kernel. When the Gaussian Filter option is selected, an interactive graphical representation of the smoothing kernel will appear. Dragging the mouse inside of the Convolution Kernel display window will then rotate the kernel. Visitors should explore the effects of smoothing on the appearance of the spatially averaged image.
A convolution mask that can be utilized to reduce noise in an image is called a smoothing or averaging filter or kernel mask. When an image is convolved with a smoothing kernel mask, the brightness value of each pixel is replaced by a weighted average of the pixel brightness values in a neighborhood surrounding the pixel. The weighting factor for various pixels in the neighborhood is determined by the corresponding value in the kernel mask. If the brightness value of any neighborhood pixel is unusually high or low (due to the influence of noise), then brightness averaging will tend to reduce the effect of the noise by distributing it among the neighboring pixels.
High spatial frequencies are typically manifested by numerous rapid cycles of brightness across an image. The highest spatial frequency that can be represented in a digital image is one whose period is equal to the width of two pixels. Smoothing masks tend to suppress the contribution of high spatial frequencies in a digital image, because they tend to eliminate details that only range a few pixels in size. An image that has had a smoothing mask applied is referred to as having been low-pass filtered. Random noise typically has a high spatial frequency and can be suppressed with a smoothing filter. Object boundaries also have a high spatial frequency and may be suppressed by a smoothing filter. The suppression of high spatial frequencies is associated with the blurring of the image, with larger kernel masks tending to blur an image to a greater extent. The choice of weighting factors in the kernel mask can also influence the strength of the blurring effect. Multiple applications of a smoothing filter will further suppress both noise and object boundaries.
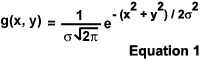
For many applications, the characteristics of the kernel mask must be chosen carefully to balance noise reduction against image degradation. A Gaussian Filter is a smoothing filter that provides the least amount of spatial blurring for any desired amount of random noise reduction. The filter operates with a convolution kernel that is a Gaussian function, which is defined in Equation 1. The parameter s in the equation denotes the sigma value or standard deviation of the Gaussian function. When used for generating a convolution kernel for a Gaussian filter, the sigma value enables the user to make fine adjustments to the amount of spatial averaging that occurs in the image. In the tutorial, the Standard Deviation slider determines the value of s in pixels. Increasing the value of s results in an increase in the size of the Gaussian kernel mask and causes the Gaussian filter to remove more spatial frequencies from the specimen image.
Contributing Authors
Kenneth R. Spring - Scientific Consultant, Lusby, Maryland, 20657.
John C. Russ - Materials Science and Engineering Department, North Carolina State University, Raleigh, North Carolina, 27695.
Matthew J. Parry-Hill, Thomas J. Fellers, and Michael W. Davidson - National High Magnetic Field Laboratory, 1800 East Paul Dirac Dr., The Florida State University, Tallahassee, Florida, 32310.
BACK TO DIGITAL IMAGE PROCESSING TUTORIALS