
Perspectives: Powers of 10

Scientists look at things with a wide variety of instruments, approaching them from various and diverse perspectives. Introduce students to new ways of looking at the world around them by having them imagine what it would be like to be a flea on a dog's back or the giant in Jack and the Beanstalk walking through a normal-sized village. Then move on to the activity, which helps students develop an understanding of exponential notation and how the powers of 10 can be used to demonstrate the relative size of things in the universe. Inspired by the video Cosmic Voyage (35 minutes, IMAX Corporation, Cosmic Voyage, Inc.), this is an opportunity to encourage students to utilize observational skills, math skills, and their imaginations to develop their own thoughts and ideas.

Plan to have your students carry out this activity in stages. You could set aside 1/2 hour or 1 hour each day for them to complete the steps and stages involved. The activity is also appropriate for a weeklong (or more) mini-unit on how things look from different perspectives.
Required Materials
- Crayons, markers, or pencils
- Assorted objects, such as leaves, notebook paper, or flowers
- Pre-cut butcher paper or bulletin board paper (1 meter square for each group)
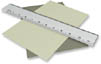
- Meter sticks, tape measures, or other measuring devices
- Hand lenses
- Field microscopes
- Science notebooks
What will the students do?
Part 1
Students will work in pairs or small groups. Using their 1 meter square piece of paper, they should trace the body outline of one of the group members. Then, students should choose one object for each person in the group (like leaves, pieces of newspaper, photographs, etc.), and place the items around the "body," outlining them as well.
Now, have students go back and put in as much detail as possible on the smaller objects (the purpose here is not to examine the detail on a human body). Students should record their observations regarding the objects in their science notebooks.
Have students divide the piece of paper into 10 equal parts by moving around the paper and marking it off in 10-centimeter increments. Then they can use their tape measures or other straightedge to connect the horizontal marks and the vertical marks. What will be left is a grid with 100 squares on top of their original drawing.
In their science notebooks, students should draw what they see in one square of the paper and then answer the following questions: How is what you see different from what you saw at first? Why are your drawings different? Would you have to be larger or smaller to see what you drew? What would happen if we divide the paper into smaller boxes?
Next, have each student cut out one square that has something drawn on it. Students should draw themselves in that square so that they are comparing the detail from the larger item originally drawn to their own image. In other words, they will be looking at the original object as if they were 10 centimeters tall.
Now, have the students take that square and divide it into ten equal parts, again marking around the paper, but this time in 1-centimeter increments. What can be seen now? You can discuss this as a whole group or have students write their observations in their science notebooks. Ask students whether they would have to move away from something or closer to something for it to look bigger.
Have students draw a picture of themselves in the smaller square of paper. Ask them: Is this what it would be like to be a giant? Or, is this what it would be like to be an ant?
Part 2
Students should examine the 10-centimeter squares that they cut out previously using 10X hand lenses. Have them draw what they see through the 10X lens in their science notebooks and answer the following questions: How is what you see through the lens different from what you can see with your eyes? Why would a person want to use a hand lens to look at something? What do you think you would see if you could get even closer?
Now, students should cut out one of the smaller (1 cm) squares. Discuss with students what they can see. Some students will be able to see great detail, depending upon how much detail they put into their work in the first place. Others will say that all they can see is "paper," which is also an acceptable answer. Students should place their squares in the field microscopes and write or draw (or both) what they see in their science notebooks. Even those who saw "only paper" before will now be able to see the detail of paper fibers or perhaps graphite in areas where they had drawn lines.
Encourage students to write down or discuss with one another any questions that they have as they are working on this activity. Also, use the activity as a launching point for a discussion about how scientists study things. Ask students: What would you do if you wanted to look at something that was very tiny? What could you use to look at something very large?
Activity Extensions

Writing - Choose a person, pet, or object and ask students: What would you see if you could keep getting closer and closer to it? In the case of a dog, for example, students will probably identify hair, skin, and fleas. Encourage students to go even further with these types of ideas and then write a story about a child with special powers who can see things at the cellular or atomic level.
Reading - Read The Borrowers (ISBN 0152099905) with the class and have students predict some scenarios that they might expect to hear or read about before each chapter or portion of the book. Then, students can check their predictions and discuss how accurate they were. Students can also draw pictures to illustrate the story. They should be able to make the connection between these drawings and the drawings they completed in the main activity.
Art - Make a class cartoon or comic book based on the way things look to someone or something very small or very large. Each student or group of students could contribute a panel or portion of the book, which could then be shared with other classes.
Game - Play a game where students each describe an item as seen by an ant without actually naming the item. Then, have each student read his or her description to the entire class and allow the others to try to figure out what they are "looking at."
| Interactive Java Tutorial | |||||||||||
|
|||||||||||
Historical Vignette: Robert Hooke

In 1665, Robert Hooke (1635-1703) improved upon earlier microscopes developed by Anton van Leeuwenhoek and Zacharias Janssen. His compound microscope consisted of an objective lens used to focus light on what he was examining, an eyepiece lens, and a field lens that increased the field of view. The light source that Hooke used with the instrument was sometimes sunlight and sometimes an oil lamp that he attached directly to the microscope. By using the device, Hooke was able to show people things that had previously gone unseen. Hooke shared many of his discoveries in a book called Micrographia that contained detailed drawings of plants and insects, which he called "minute bodies."
Discussion - Though his contributions to the field of experimental science are well documented, Hooke is not as well known as his contemporary colleague, and rival, Isaac Newton. The fact that he had to contend with a contemporary who wanted to discredit him and his work could be a subject for class discussion. Students should think about other famous men and women in history who may have had to deal with this type of situation. A prime example is Rosalind Franklin, who worked with Francis Crick and James Watson. Although she was instrumental in the discovery of the structure of DNA, Crick and Watson are credited with the discovery and received a Nobel Prize for the achievement.
Activity - Have students research and present their findings on Robert Hooke and Isaac Newton. Presentations should include who, what, when, where, and why; in particular, students should note contemporary current events, linking scientific accomplishments with political and social happenings. For example, Isaac Newton's scientific gift emerged during a time when he was self-taught; studying at home for two years while Trinity College at Cambridge was closed due to an outbreak of plague.
Artist Vignette: M. C. Escher

M. C. Escher's graphic work is popular on t-shirts, ties, and other items of apparel, so it may be familiar to some of your students. Many of the images are easily obtainable and are appropriate to introduce with this activity due to their emphasis on perspective. The book M. C. Escher: The Graphic Work (ISBN 1566197899) is particularly informative, containing an introduction written by the artist and illustrations of many of his most famous works.
Maurits Cornelis Escher (1898-1972) studied graphic arts in the Netherlands and created his works based on different ways of looking at things. In particular, he is famous for utilizing conflicting perspectives to create scenes that could not occur in reality due to the laws of nature. Escher, however, was not a good student and lived for the two hours each week that he was instructed in art. In fact, Escher never graduated and repeated grades twice. Even the artwork that he submitted for a final grade was not thought of as good enough to receive the highest grade. Nevertheless, Escher's father still believed that his son could and should become an architect. In 1919, Escher entered the School of Architecture and Decorative Arts in Haarlem, Netherlands. He then traveled extensively with other artist friends, sketching and creating the woodcuts for which he would later become famous.
Activity - Although some of Escher's prints are disturbing, particularly for young children, others, like Dewdrop, fit in very well with the perspectives activity. Also, his work Puddle could be used as a starting point for a story. After showing it to students have them write about what happened in the picture.
Research - There are several web sites featuring Escher prints that students could visit to access the images directly. It is recommended, however, that you thoroughly explore any web sites that you recommend to students.
|
||||||
|
||||||