
Investigating Shadows
A shadow is a dark outline or image cast by an object that blocks light. It is formed when light hits an opaque object that does not let the light pass through. Everywhere else around the opaque object, the light continues in a straight path until it bounces off the ground or wall behind the object. The result is a dark patch, or shadow, with the same outline as the object surrounded by light.
The concepts of transparence, translucence, and opaqueness were introduced to students in Activity 10, but it would still be a worthwhile activity for students to create a K-W-L chart about shadows. Students can create this chart in their science notebooks as individuals or on butcher or chart paper as a group. Afterwards, they will likely find answers to many of their questions as they investigate how the size of a shadow and the size of the object that produced the shadow are related.
Required Materials
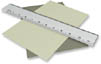
- Flashlights
- Scissors
- White paper or poster board
- Rulers or measuring tape
- Objects to use to produce shadows
- Science notebooks
- Graph paper
What will the students do?
The first part of the activity involves a brief trip outside. Working in pairs, one student will stand in the sunlight and the other will draw a sketch of the shadow that is formed. Have students make two shadows and sketch them, one with the person facing the sun, and the other with the person's shoulder facing the sun. Students will then discuss how the shadows are alike and how they are different.
Returning to the classroom, students will take an object and use it to make a shadow by illuminating it with a flashlight. They will follow the directions on the student page and discover how to change the length or direction of the shadow. Students will then choose a flat object (i.e. paper) and a larger, solid, object (stapler, statuette, etc.) with which to work. They should compare the shape of the shadow with the shape of the object and the size of the object with the size of the shadow.
Activity Extensions

Reading/Writing - Read aloud Shadow by Marcia Brown (ISBN 0689718756). Based on stories told by African storytellers and tribal leaders, Shadow is a rich tale of how shadows can become part of our cultural heritage. Use the book to encourage students to write their own stories about shadows. It can also be a starting point for looking for other stories about shadows that are specific to certain cultures.
Narrative Writing - Use the following as a writing prompt for your students: Each of us has studied how light produces shadows. Before you begin writing, think about a time when the shadow of an object might have frightened you. Now write a story about this experience and why the shadow frightened you.
Art/Reading - Show students William and the Magic Ring (Museum of Fine Arts, Boston, Catalog 1-800-225-5592, ISBN 0878464670). The book is an excellent demonstration to use before completing Activity 12 and is also a good way to start a writing activity since it is a story about a boy who imagines an animal battle just by looking at his window shade.
Photo Fakery - The camera was invented in 1839 and as early as the 1840s and 1850s, photographers were manipulating images. Photographs were a new way to convey messages to family and friends, as well as a way for people to get a firsthand look at historical figures and events. Sometimes photographs were "faked" by inserting one image onto another photograph to communicate a certain message. In order to determine whether a photo has been manipulated, experts look first at light and shadows. With your students, look at photographs and determine where the light is coming from. If you can, find photographs that have been changed (for example, putting one person's face on another person's body) and have students look at the light and shadows and figure out if the photo has been changed. A good source of information on the subject is Photo Fakery: The History and Techniques of Photographic Deception and Manipulation by Dino A. Brugioni (ISBN 1574881663).
Historical Vignette: Lewis H. Latimer

Lewis H. Latimer was born in Chelsea, Massachusetts in 1848. As a young man, he learned mechanical drawing while working for a Boston patent office. In 1880 Hiram Maxim of the U.S. Electric Lighting Company hired him to help develop a commercial electric lamp. Two years later, Latimer invented a device for efficiently manufacturing the carbon filaments used in electric lamps and shared a patent for the Maxim electric lamp. He patented a threaded wooden socket for light bulbs and supervised the installation of electric streetlights in New York City, Philadelphia, Montreal, and London, as well.
Lewis Latimer was good at working both on his own and in conjunction with other people. For instance, he assisted Alexander Graham Bell in preparing the application for his telephone patent. Then, in 1918 he became one of the 28 charter members of Thomas Edison's elite research team known as Edison's Pioneers. He was the only African-American in this prestigious, highly selective group. While working for Edison, Latimer wrote Incandescent Electric Lighting, the first engineering handbook on lighting systems.
Cooperative Learning Research - Divide students into groups of three or four and give each group a different type of light to research. Each member of a group could have a certain responsibility, such as researching how the particular light works, researching the inventor and the year the light was patented, researching the use of their particular type of light, or illustrating and making a model of the of light. Groups could present their information to the rest of the class. Types of lights could include incandescent, fluorescent, neon, halogen, mercury vapor, sodium vapor, or infrared lights.
Florida History - Thomas Edison made his home for part of his life in Fort Myers, Florida. He originally came to Florida because he believed that carbonized bamboo would make a good filament for his newly invented light bulb. In Fort Myers, he became very good friends with his next-door neighbor, Henry Ford. Have students imagine what a conversation between Henry Ford and Thomas Edison might have sounded like. They often sat together, joking and laughing and visiting with other famous men and women of their time. Students could role-play using a written script and share their ideas with the class.
Activity - Thomas Edison and his wife, Mina, constructed a walkway of stepping-stones, each one placed in the garden after someone visited their Florida home. Have students design a walkway. Each stone should have on it the name of the person who visited, the date of the visit, and a word or two to describe the visit. Students can either use the time period in which Thomas Edison constructed his walkway or choose another. For example, another historical vignette in Science, Optics and You features Galileo Galilei. Have students imagine who Galileo might have spoken with to discuss his astronomical theories and have them create a walkway based on those famous scientific figures.
Artist Vignette: John Miers

One form of preserving images is the creation of silhouettes. The development of silhouettes has been linked to that of outline drawing and shadow painting. It is said that this art form first appeared in France and Spain in the cave murals of Stone Age people. Tracing the outline of an object's shadow and then filling the drawing in with a flat color made the drawings realistic. Ancient Greek and Roman painters drew silhouette outlines of a person's shadow cast by sunlight, as well as by candlelight or lamplight.
Silhouette techniques were particularly popular in Europe during the eighteenth century. These shadow portraits, which became collectors pieces among the wealthy, were painted on different materials such as plaster, wax, and paper and were elaborately framed. One of the most famous silhouette artists of the period was John Miers (1758-1821). In fact, he has been called one of the finest and most widely known profilists in the history of art, and was one of the few artists that painted silhouettes on plaster. A native of Leeds in northern England, Miers sold paints as did his father, but by 1781 he expanded his business to include painting coaches, gilding, and making profiles. He was so successful in making silhouettes that in 1791 he opened a studio, employed several artists, and had a very lucrative business. He continued making silhouettes until around 1800.
Activity - Ask students to create a silhouette of a friend in the classroom. The materials they will need to do this are paper, a pen, and a light source. The students should seat their classmates sideways in a chair positioned against a blank wall and then position a light a few feet from the wall so that it creates a shadow. They should then tape tracing paper on the wall and trace the outline. The profile should be placed on black paper and cut out of both sheets with scissors. Finally, the students should mount the black silhouettes on light-colored paper.
|
||||||||